Barbell Row Variations: Which Builds the Most Back Muscle
Pendlay rows, Yates rows, T-bar rows, and more. Here is what each variation does differently and which one you should prioritize.
Key Takeaways
- The Pendlay row with a dead stop from the floor builds the most raw pulling strength since every rep starts from zero and eliminates momentum.
- Conventional bent-over rows at 45 degrees are the most versatile for hitting all back muscles but form breaks down fast when the weight gets heavy.
- T-bar rows are king for building mid-back thickness because the close neutral grip hammers your rhomboids and middle traps harder than other variations.
- Seal rows eliminate all cheating and lower back involvement, making them the best pure hypertrophy exercise for back development.
- The more horizontal your torso angle, the more your lats have to work compared to staying upright.
Get This on WhatsApp
Get a quick summary and link sent straight to your WhatsApp.
Send Me This ArticleNot all rows are created equal
Walk into any gym and you will see ten different people doing barbell rows ten different ways. Some are nearly upright, some are bent over parallel to the floor, some are heaving the weight with full-body English, and some are doing something that looks like a deadlift-curl-shrug hybrid.
The thing is, many of those variations are actually legitimate exercises with different purposes. The angle of your torso, the path of the bar, and whether you start from a dead stop or use a touch-and-go tempo all change which muscles do the bulk of the work.
I have been rowing in some form for over 15 years and I have opinions about each variation. Some I think are clearly better than others for most goals. Let me break down the main barbell row variations, what they each do, and when to use them.
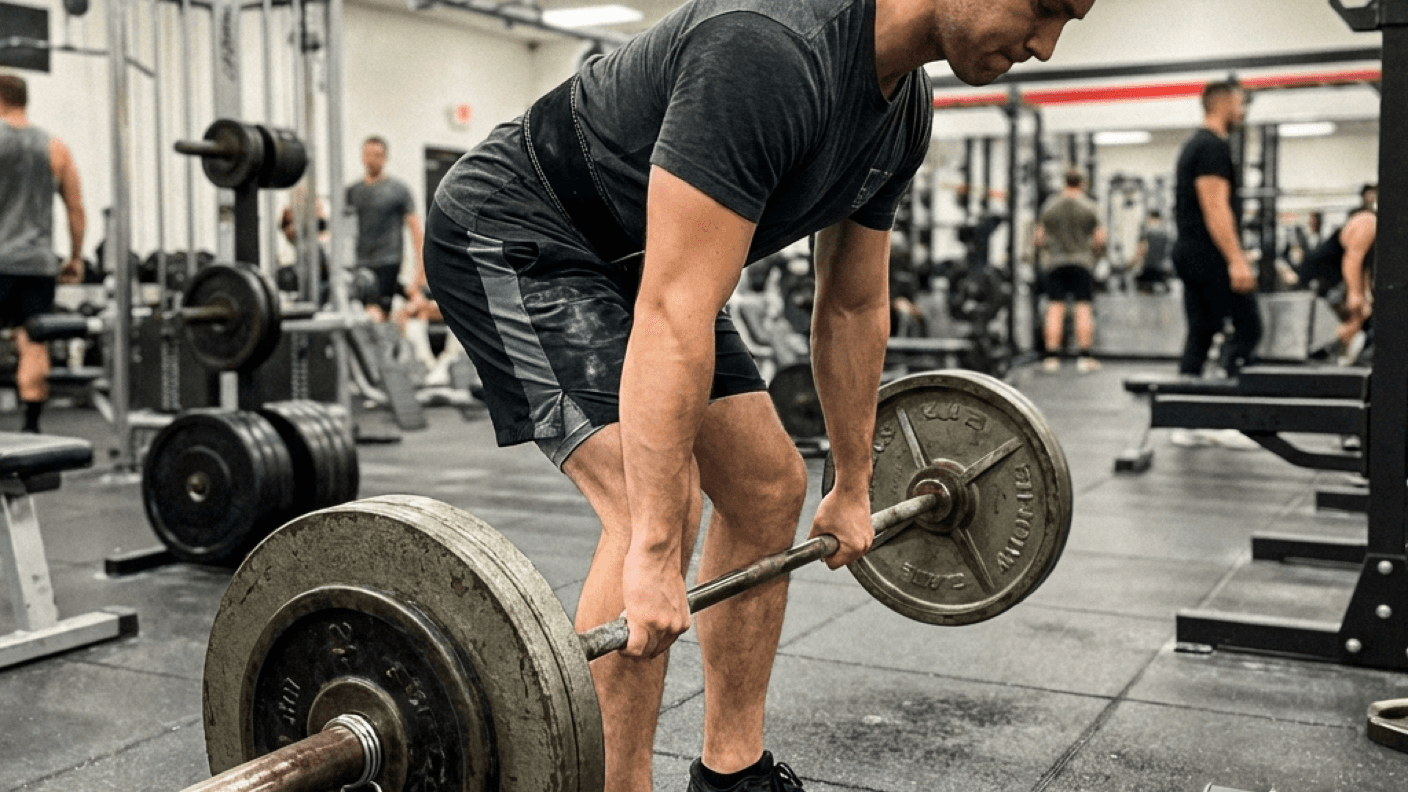
The conventional barbell row (bent-over row)
This is what most people mean when they say "barbell row." You pick a barbell up, bend over until your torso is roughly 45 degrees to the floor (give or take), and row the bar into your lower chest or upper abdomen.
How to do it:
- •Stand with feet shoulder-width apart, barbell in hand with an overhand grip.
- •Hinge at the hips until your torso is at roughly a 45-degree angle. Some people go lower (more horizontal), some stay a bit more upright. Anywhere from 30 to 60 degrees works, but the more horizontal you are, the more your back has to work and the less you can use momentum.
- •Let the bar hang at arm's length. Slight bend in the knees.
- •Row the bar into your lower chest or upper abdomen. Think about driving your elbows back and behind you, not just pulling with your hands.
- •Squeeze your shoulder blades together at the top.
- •Lower under control. Two seconds down.
The conventional bent-over row is the most versatile rowing variation. It hits the lats, rhomboids, rear delts, traps, and erectors. The lower back works isometrically to hold your position, which makes it demanding on the whole posterior chain.
The downside? Form tends to degrade fast when the weight gets heavy. People start standing more upright, turning a row into a shrug. Or they start heaving the weight with momentum from their hips. Some degree of body English is fine on heavy sets, but if you look like you are having a seizure to get the bar to your chest, the weight is too heavy.
The Pendlay row
Named after the late Glenn Pendlay, who coached some of the best weightlifters in the United States. The Pendlay row is a strict row from a dead stop on the floor.
How to do it:
- •Set up like a conventional deadlift: bar over mid-foot, hips back, chest up.
- •Your torso should be parallel to the floor (or very close to it). This is the key difference from a conventional row.
- •Row the bar explosively from the floor to your lower chest.
- •Lower the bar back to the floor. Full dead stop. Reset. No bouncing.
The Pendlay row is my favorite rowing variation for raw pulling strength. The dead stop eliminates momentum and the stretch reflex, meaning every rep starts from zero. You have to generate all the force from scratch. It also enforces good form because you have to reset your position between reps.
The strict horizontal torso angle increases lat activation compared to a more upright row, because the line of pull is more perpendicular to your torso. Fenwick et al. (2009) demonstrated that more horizontal rowing positions increased latissimus dorsi activation relative to more upright positions.
The downside is that the Pendlay row is hard on the lower back because of the strict horizontal position. If your erectors are fried from heavy deadlifts earlier in the week, Pendlay rows might not be the best choice.
The Yates row
Named after Dorian Yates, six-time Mr. Olympia and one of the most massive bodybuilders in history. Yates trained his back with an underhand, relatively upright row and built one of the greatest backs in bodybuilding history.
How to do it:
- •Stand with the barbell in an underhand (supinated) grip, about shoulder width.
- •Bend forward only about 30 degrees from vertical. Much more upright than a traditional row.
- •Row the bar into your lower abdomen, driving your elbows straight back.
- •Lower under control.
The Yates row is more upright than other variations, which reduces lower back stress significantly. The underhand grip also shifts more work to the biceps and lower lats compared to an overhand grip. You can typically handle more weight on a Yates row than a strict bent-over row because the shorter lever arm and more upright position give you a mechanical advantage.
Dorian himself tore a biceps tendon doing this exercise, which is the main risk of the underhand grip version. Heavy supinated rows put the biceps tendon in a vulnerable position. Keep the weight manageable and do not let your ego overrule your joints.
If you want to do a Yates-style row but worry about your biceps, use an overhand grip at the same upright angle. You lose some lower lat emphasis but gain safety.
The T-bar row
The T-bar row uses either a dedicated T-bar machine or a barbell wedged into a corner (landmine setup) with a close-grip handle.
How to do it:
- •Straddle the bar with a V-grip handle placed under the bar near the plates.
- •Bend forward to about 45 degrees.
- •Row the handle into your chest, squeezing your shoulder blades together at the top.
- •Lower under control.
The T-bar row is one of the best exercises for mid-back thickness. The neutral grip and close hand position emphasize the rhomboids, middle traps, and inner lats. Arnold Schwarzenegger was famous for doing T-bar rows, and it showed in his back development.
The fixed path of the bar (it pivots on one end) also makes the T-bar row slightly easier to control than a free barbell row. This is good because it lets you focus more on the contraction and less on stabilization.
Some gyms have a dedicated T-bar machine with a chest pad. These are excellent for isolating the back because the pad eliminates the need for your lower back to stabilize. If your lower back is a limiting factor on rows (and for many people it is), the chest-supported T-bar is gold.
The seal row
The seal row is a bench-supported row where you lie face down on an elevated bench and row from a dead hang. There is zero lower back involvement, which makes it a pure horizontal pulling exercise.
How to do it:
- •Set up a flat bench on blocks or use a dedicated seal row bench so there is enough space underneath for your arms to hang fully extended with plates in hand.
- •Lie face down on the bench, chest at the edge.
- •Grab dumbbells or a barbell from the floor.
- •Row to the bench, squeezing your shoulder blades together.
- •Lower until your arms are fully extended. Full stretch at the bottom.
The seal row removes cheating entirely. You cannot use momentum, you cannot use your lower back, and you cannot stand up to heave the weight. It is just your back muscles pulling. This makes it outstanding for hypertrophy because every ounce of tension goes through the target muscles.
The downside is that it is annoying to set up and most gyms do not have a dedicated seal row bench. You have to stack plates under a regular flat bench to get enough clearance. But if you can make it work, it is one of the best back exercises that exists.
Underhand vs overhand grip
Your grip changes the exercise more than most people realize.
Overhand (pronated) grip:
- •More rear delt and upper back activation
- •More rhomboid and mid-trap involvement
- •Naturally pulls toward the lower chest
- •Less bicep involvement
Underhand (supinated) grip:
- •More lower lat activation
- •More bicep involvement (which can be good or bad)
- •Naturally pulls toward the lower abdomen
- •Higher risk for bicep tendon issues at heavy weights
Neutral grip (palms facing each other):
- •Good balance between upper and lower back
- •Comfortable for most people
- •Lower injury risk than either pronated or supinated
- •Only possible with T-bar, dumbbells, or specialty bars
For most people, I recommend using overhand grip as your default and mixing in underhand or neutral grip periodically for variety. If you have any bicep tendon issues, stick with overhand or neutral.
Which variation is best for each goal
| Goal | Best variation(s) | Why |
|---|---|---|
| Overall back thickness | Conventional row, T-bar row | High load potential, hits everything |
| Lat width | Pendlay row, underhand row | Horizontal torso + grip target lats |
| Mid-back detail | T-bar row, seal row | Emphasize rhomboids and mid traps |
| Strength | Pendlay row | Dead stop, no momentum, builds raw power |
| Hypertrophy (pure) | Seal row, chest-supported T-bar | Eliminates lower back as limiter |
| Lower back is beat up | Seal row, chest-supported row | Zero spinal loading |
Common rowing mistakes
Standing too upright. The more upright you stand, the more the row becomes a shrug. If your torso is at 60+ degrees on what is supposed to be a bent-over row, you are not getting the back development you think you are. Get your torso down.
Pulling to the wrong spot. Where the bar touches changes the emphasis. Pulling to the lower chest/upper abdomen hits the lats and lower traps. Pulling to the sternum or upper chest hits the rear delts and rhomboids more. Know what you are targeting and pull to the right spot.
Rounding the lower back. Same problem as deadlifts. If your lower back rounds under load, the stress shifts from your back muscles to your spinal structures. Keep a neutral spine. If you cannot, the weight is too heavy or your erectors are fatigued.
Jerking the weight up. A little body English on the last rep or two of a heavy set is fine. Using your hips to heave every rep is not rowing, it is a weird deadlift-row hybrid that trains nothing effectively.
Ignoring the eccentric. Letting the weight drop after each rep throws away half the stimulus. Control the descent for 2 seconds. This alone will improve your back development more than adding another set.
Not squeezing at the top. If the bar bounces off your torso and drops immediately, you are not getting a full contraction. Squeeze your shoulder blades together at the top and hold for a beat. You should feel the muscles between your shoulder blades cramping.
Programming rows for a bigger back
Rows should be a primary movement in your back training, not an afterthought you do after 10 sets of lat pulldowns. Here is how I typically program them:
Strength-focused day:
- •Pendlay row: 4x5-8 @ RPE 8
- •Lat pulldown: 3x8-12
- •Face pulls: 3x15-20
Hypertrophy-focused day:
- •Seal row or chest-supported T-bar row: 4x8-12 @ RPE 8-9
- •One-arm dumbbell row: 3x10-12 per arm
- •Cable row: 3x12-15
- •Rear delt flye: 3x15-20
Rowing frequency: Two sessions per week with some form of horizontal row is a solid baseline. One heavier session with a free-standing row and one lighter session with a supported row gives you both strength and hypertrophy stimulus.
Volume: 10-20 sets of horizontal pulling per week is where most people should land. If you are doing a lot of vertical pulling (pulldowns, chin-ups) on top of that, you might be at the lower end. If rows are your primary back exercise, aim for the higher end.
Progression: Add weight when you hit the top of your rep range with clean form and a good squeeze at the top. For barbell rows, 5-pound jumps work well. Do not rush progression. I would rather see someone row 155 with perfect form and a 2-second squeeze than 225 with full-body momentum and no contraction.
Frequently Asked Questions
- Which barbell row variation is best for back thickness?
- The Pendlay row from a dead stop on the floor hits the entire back hard and forces strict form since you reset every rep. For pure upper back thickness, a chest-supported row or Yates row with an underhand grip targets the lats and rhomboids without lower back fatigue limiting you.
- What is the difference between Pendlay rows and bent-over rows?
- Pendlay rows start from the floor each rep with your back parallel to the ground, making each rep a dead stop. Standard bent-over rows keep the bar hanging, which adds time under tension but usually leads to more cheating. Pendlay rows enforce honesty.
- Should I go heavy on barbell rows?
- Moderately heavy with good form beats heavy with garbage form. If you are standing nearly upright and heaving the weight, you are doing a weird shrug, not a row. A solid 185-225 pound row with a controlled tempo and full stretch will build more back than a jerky 315.
- How many times a week should I row?
- Two to three rowing sessions per week across different variations is ideal. You might do heavy barbell rows on one day, cable rows on another, and dumbbell rows on a third. The back is a huge muscle group and can handle a lot of volume.